Archive

1/72 Airfix concorde

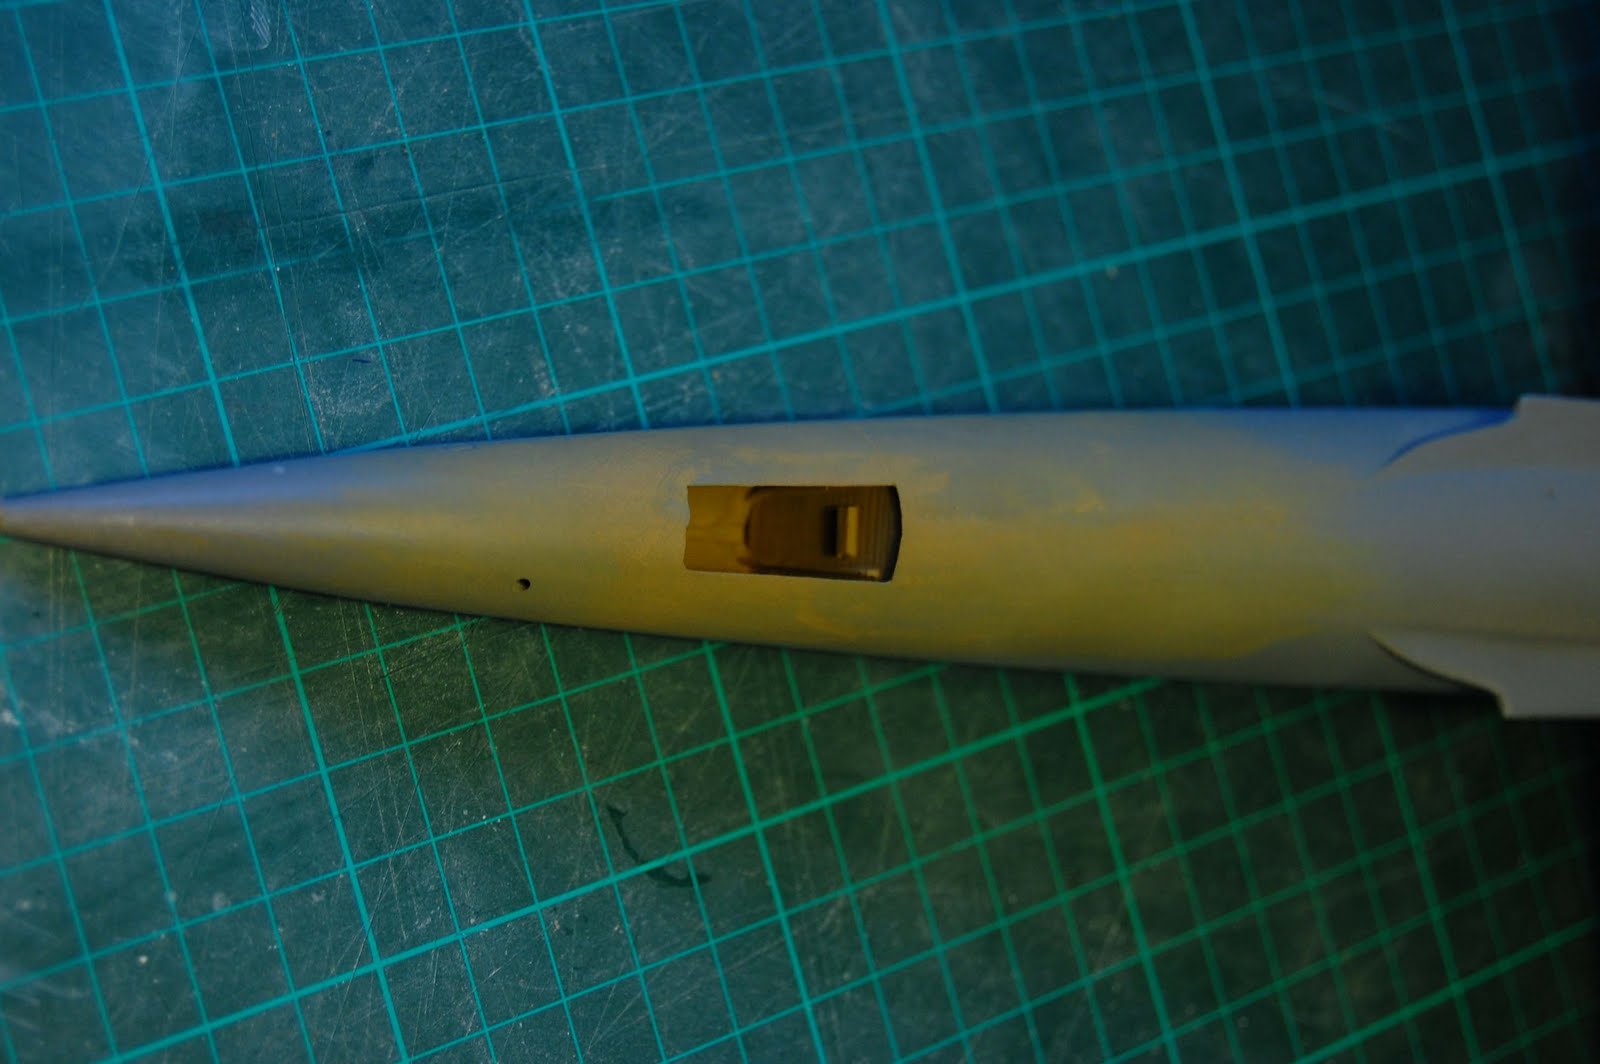
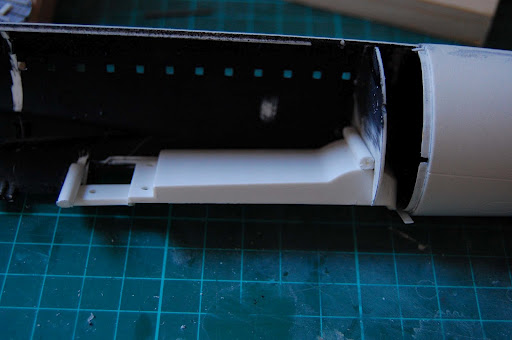
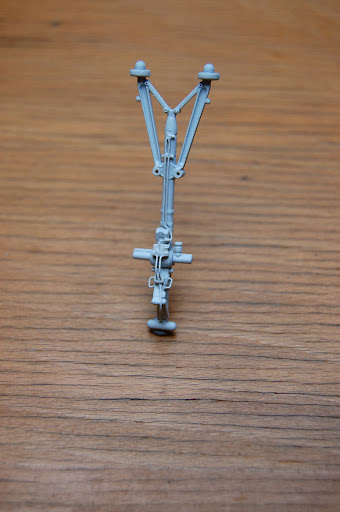
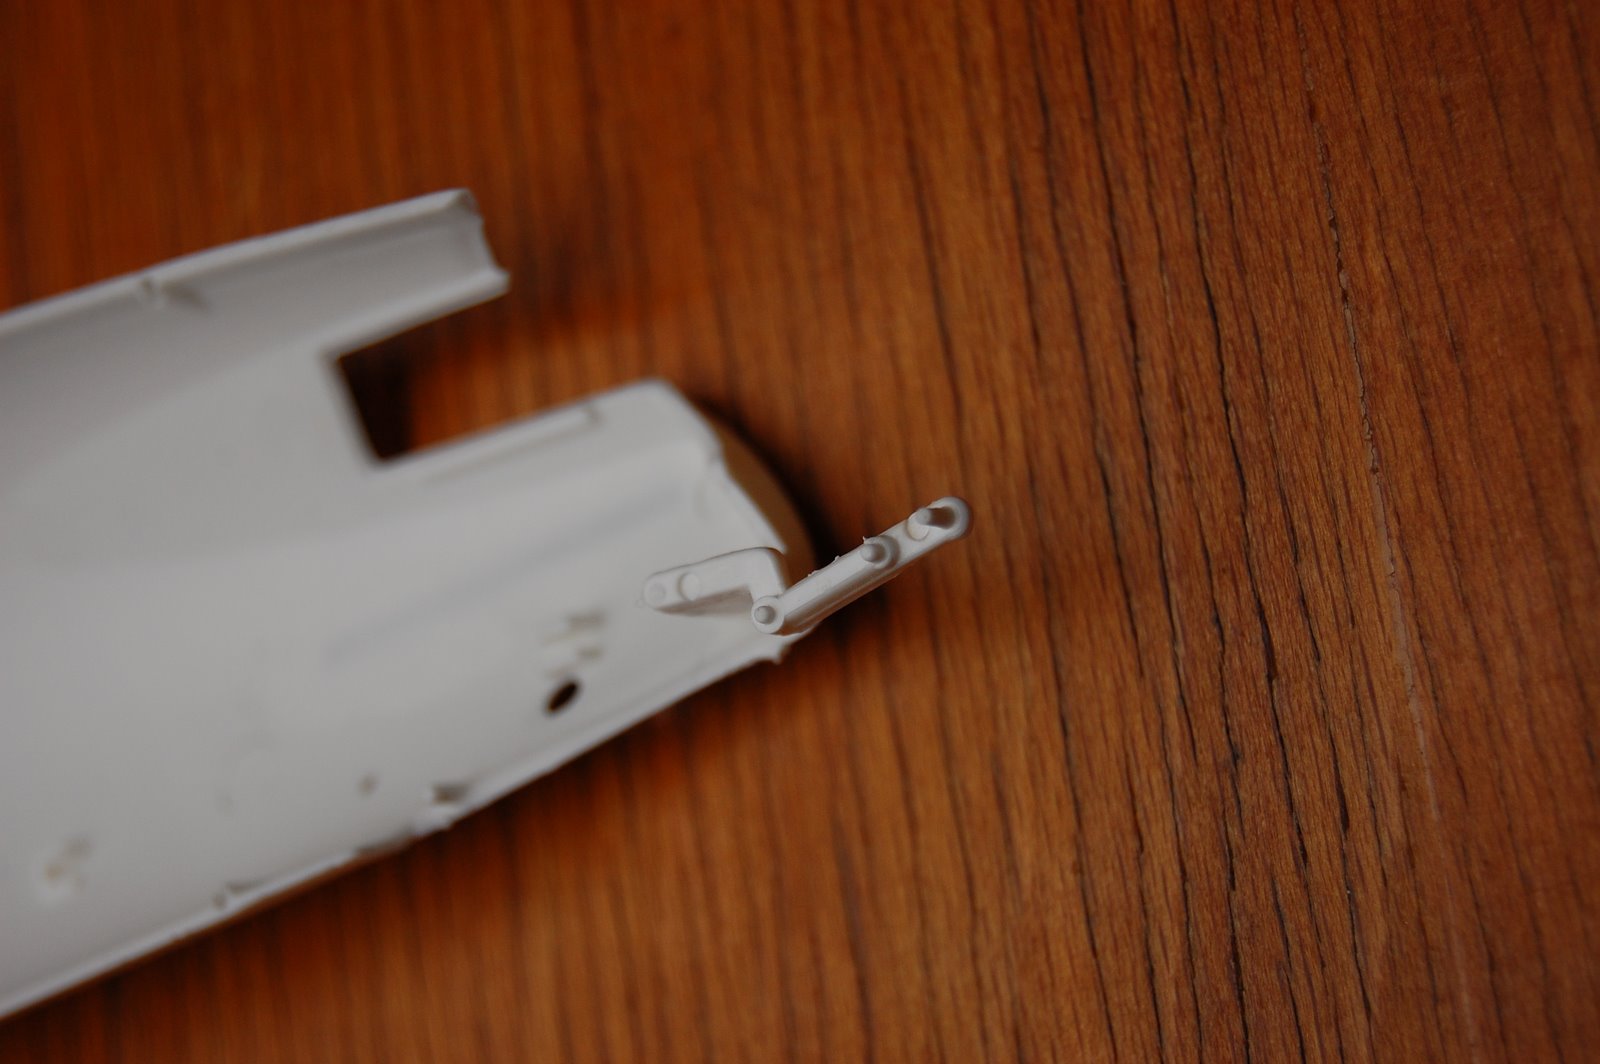
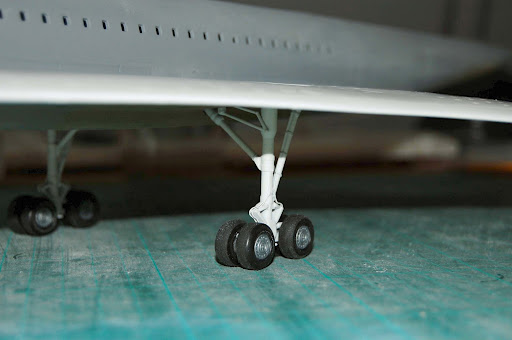
Last night I made a bit of an effort on the main gear. Just a bit of detailing with foil strips and stretched sprue. I sprayed some primer over and thought I could pop the wheels on to see how it looked…


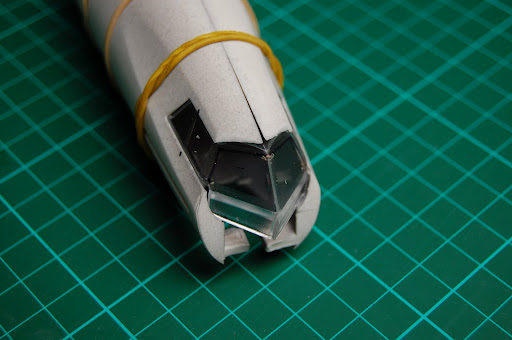
…then I thought I could dry fit the undercarriage to the body, also to see how that looked…
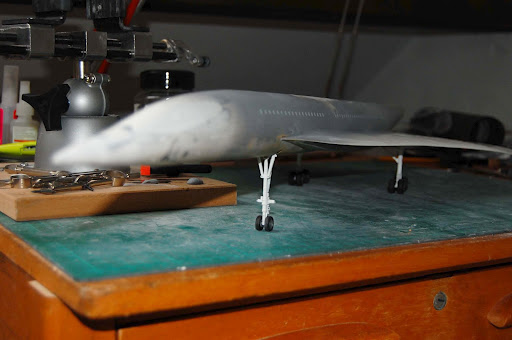
…and it looked good.

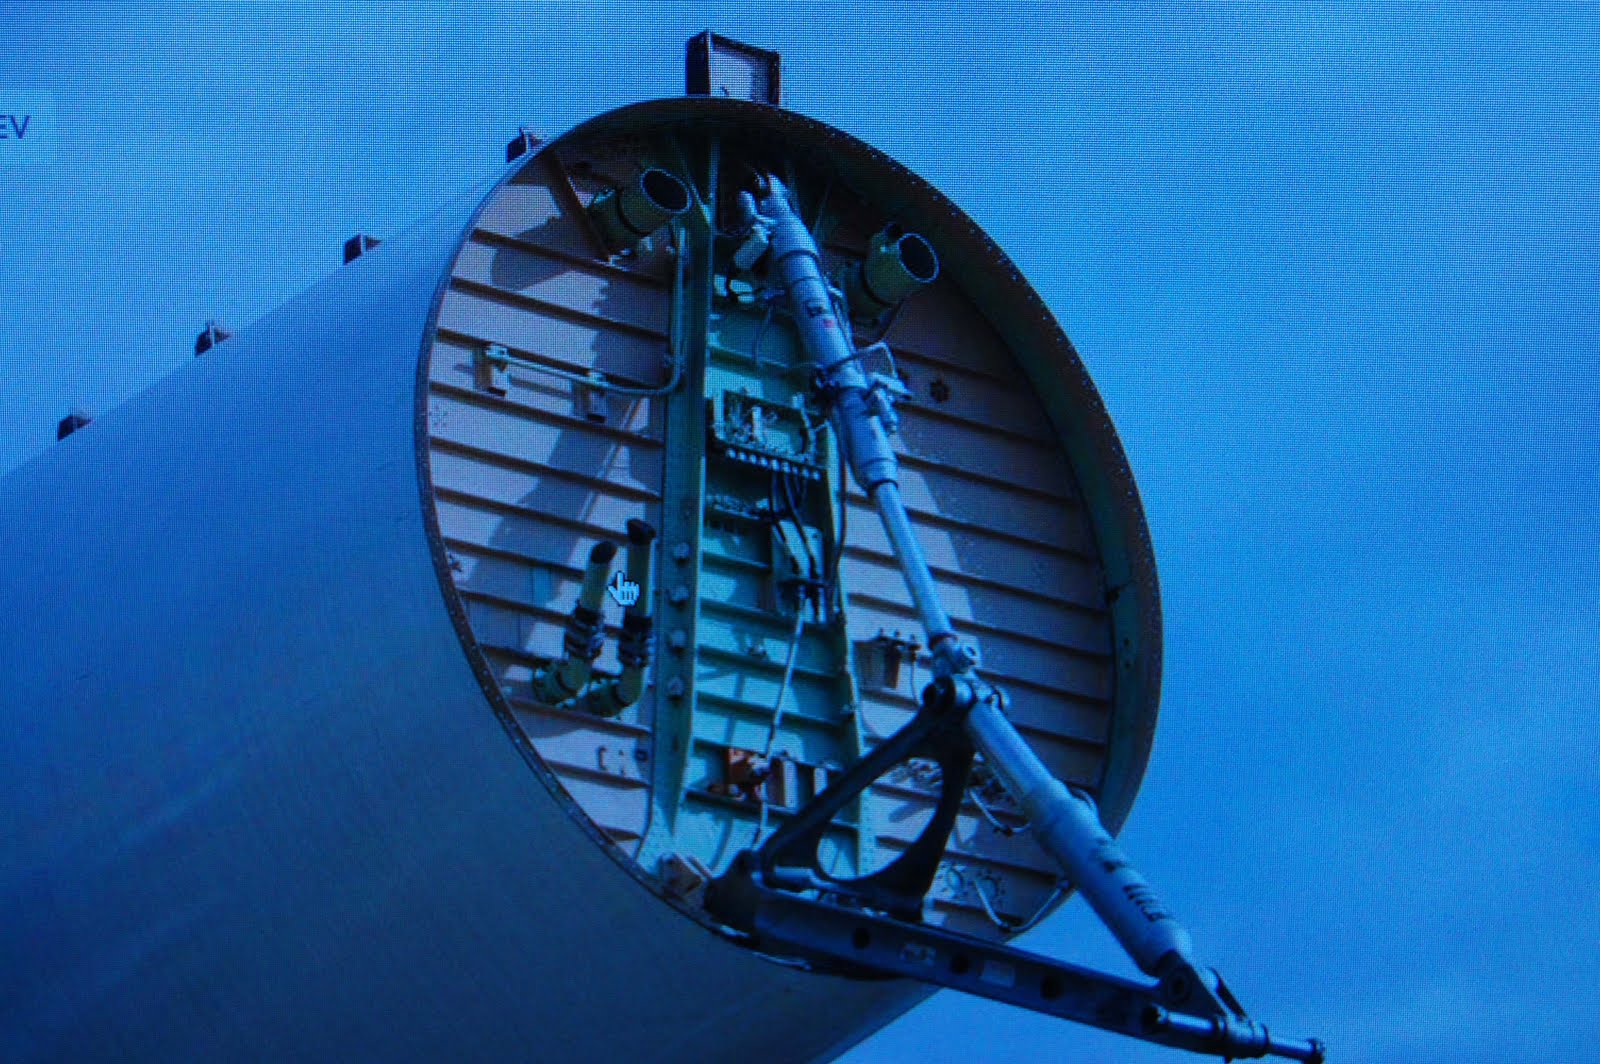
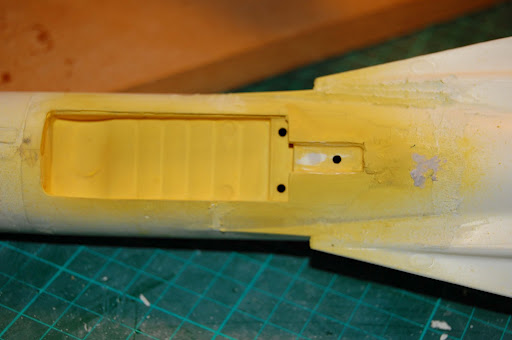
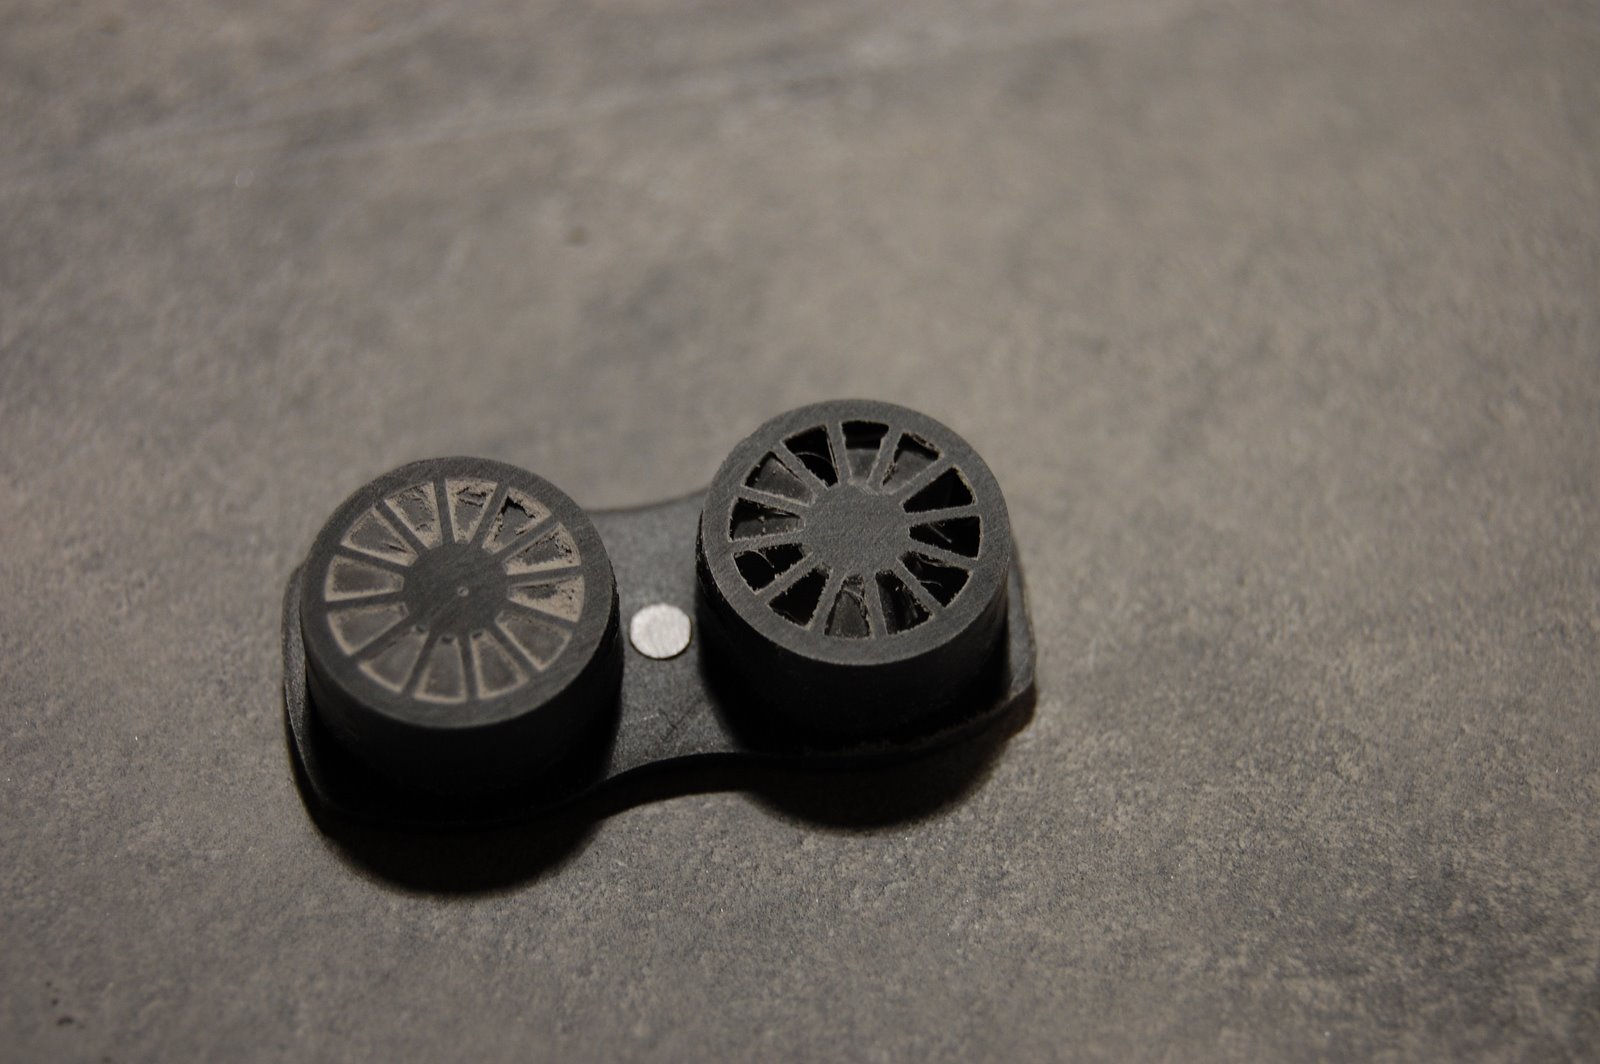
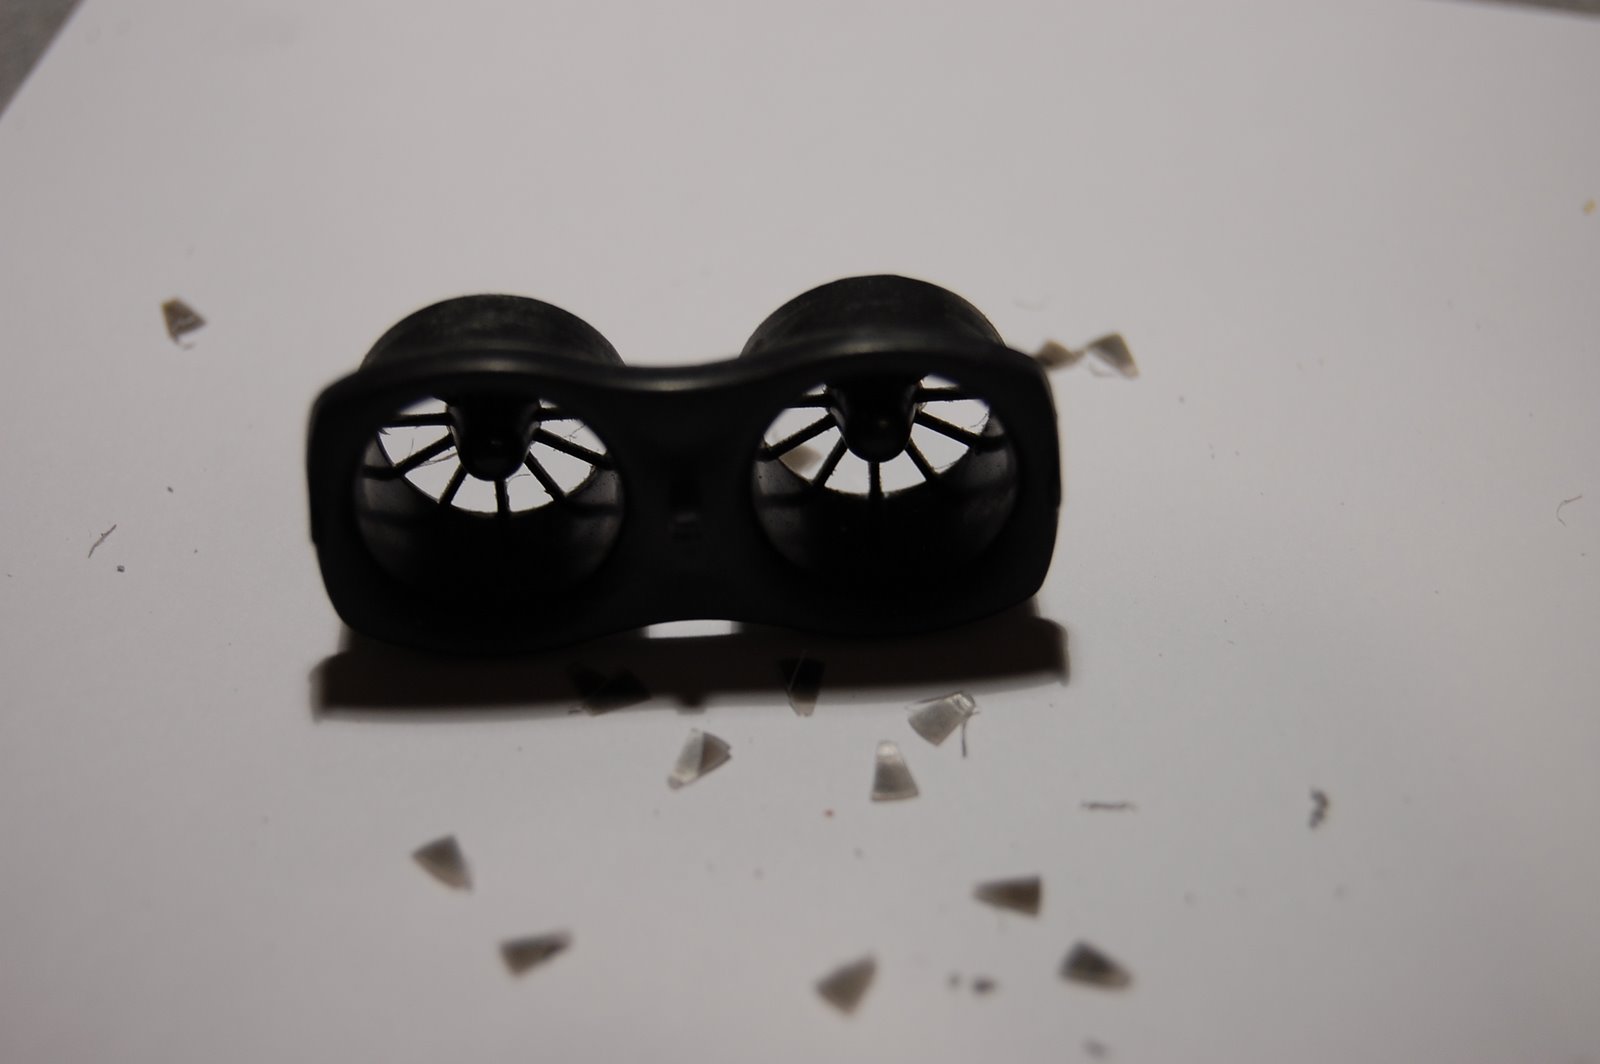
The nose wasn’t as high as I thought it would be and I may reconsider cutting down the front leg. I purchased a set of resin wheels and tyres from Hannants because I wasn’t happy with the results of using some wet & dry to shape the vinyl tyres supplied. The wheel hubs aren’t too bad, but lack the detail on the inner faces too. The resin set is primed, but I’m not sure what colour to use. I’m not sure about using a metallic silver as it can look unrealistic in this scale. I’ve been thinking about using a light grey instead, but I’ll experiment a bit first. Also the shock absorber will need something to simulate a highly polished surface, perhaps some foil. The best method for some parts of the undercarriage would be telescopic tubing, but I don’t have anything at the correct size, and can’t face paying more for P&P than the contents over the internet. When I get a large order together I’ll add some tubing to it. There’s always something.

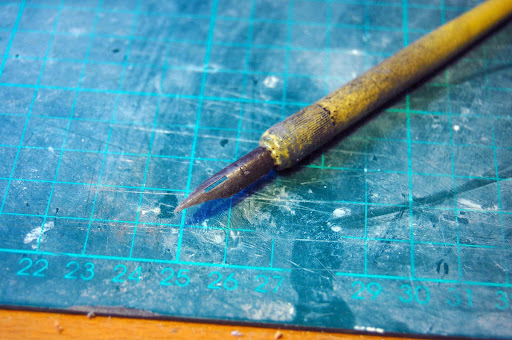
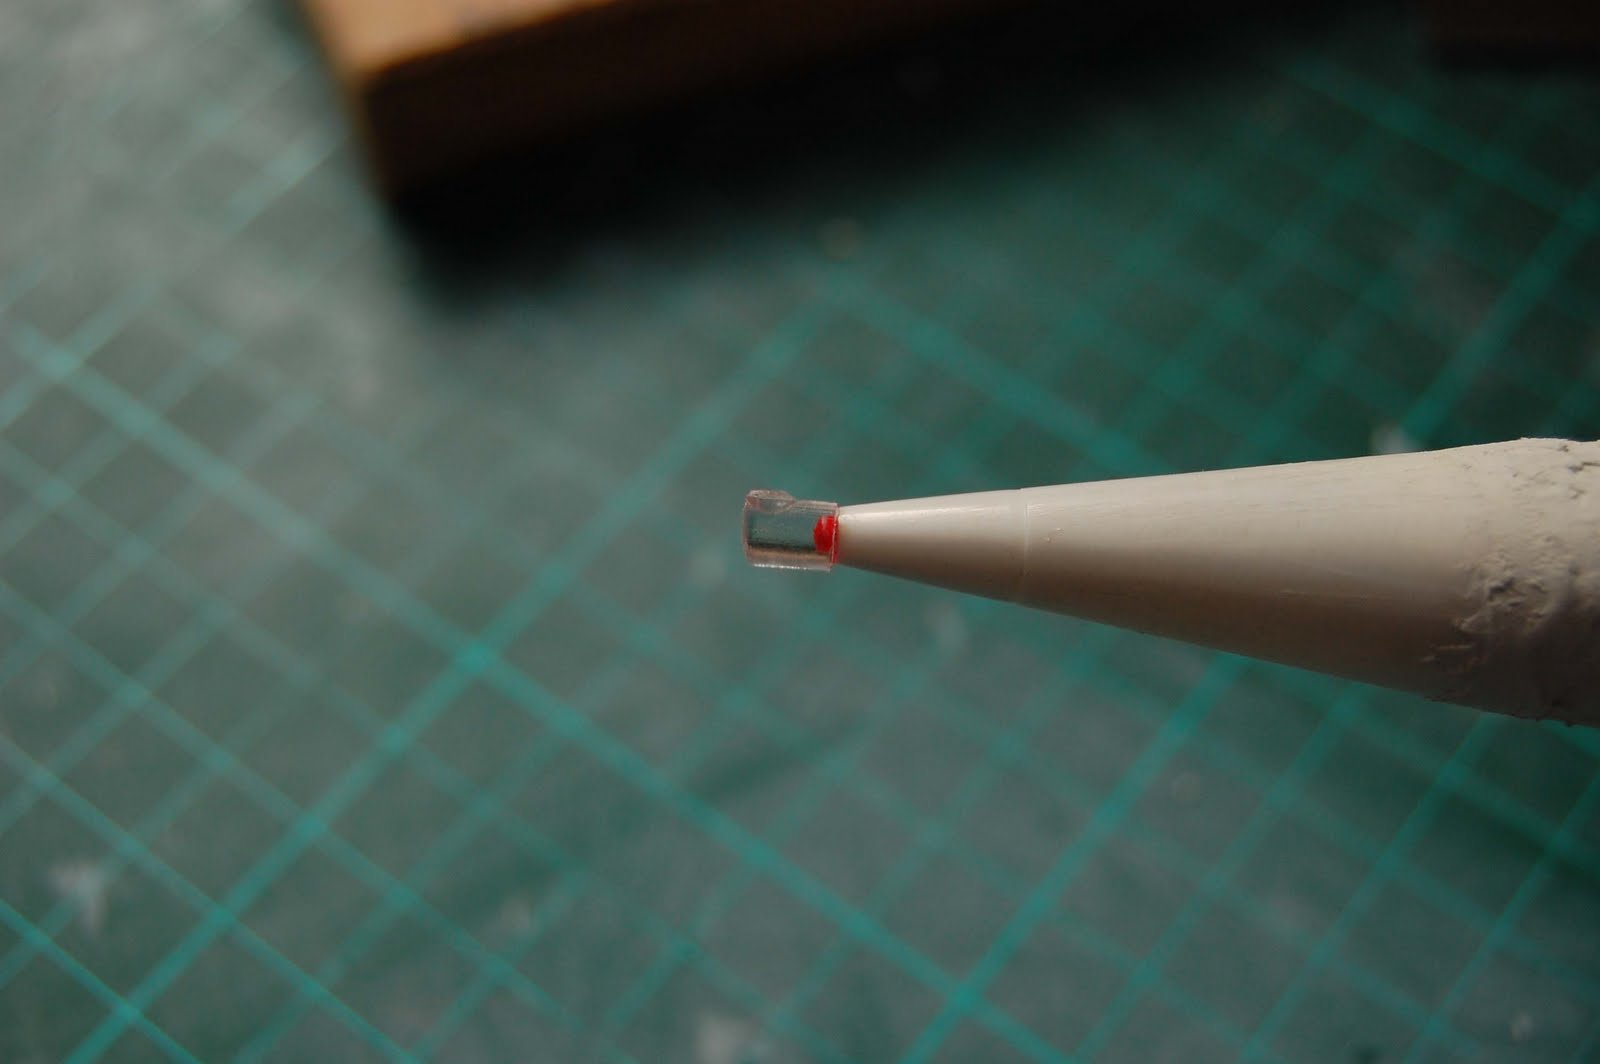
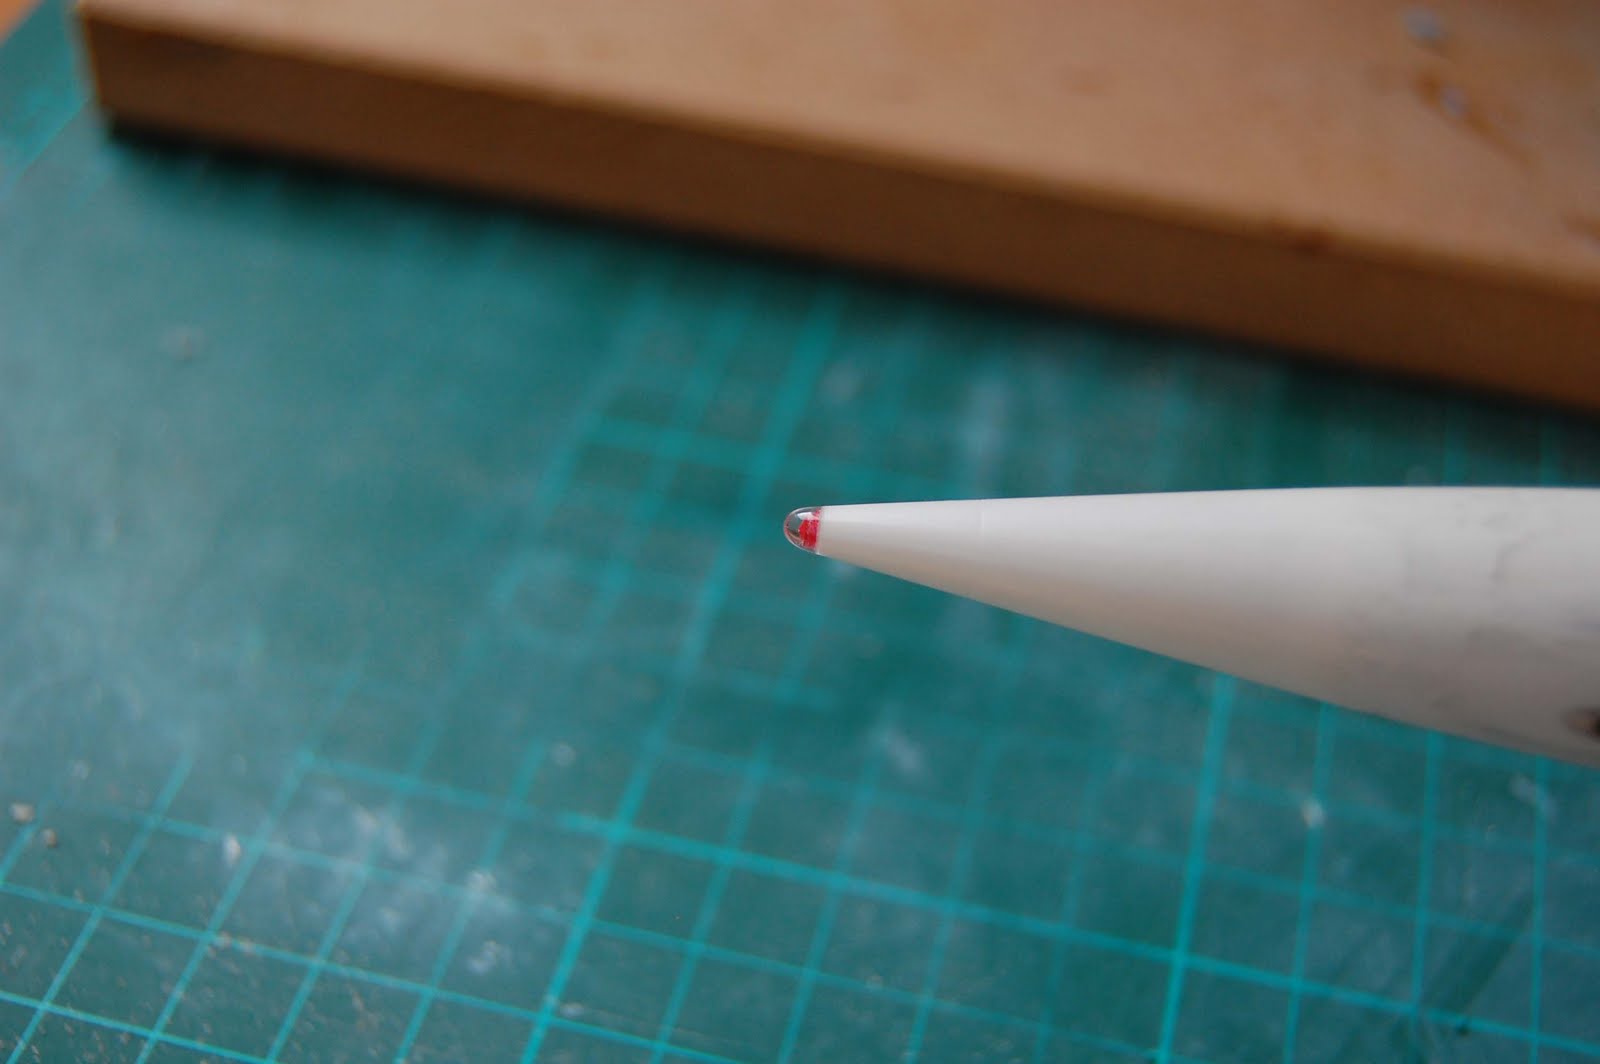
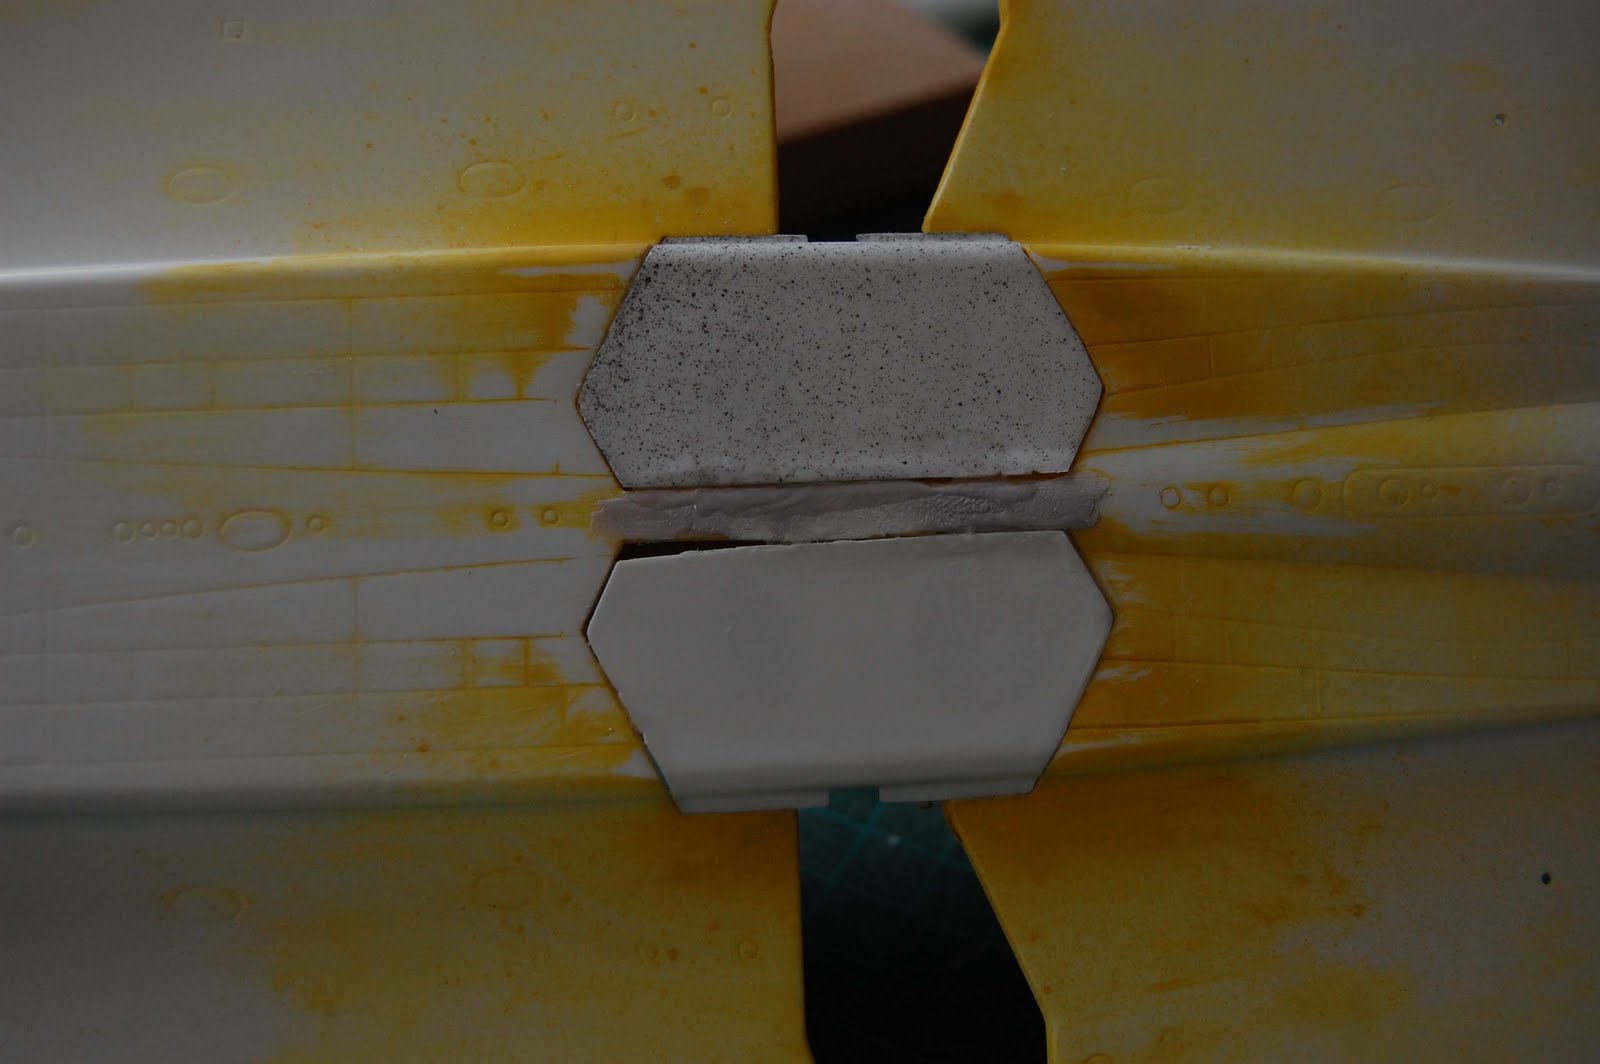
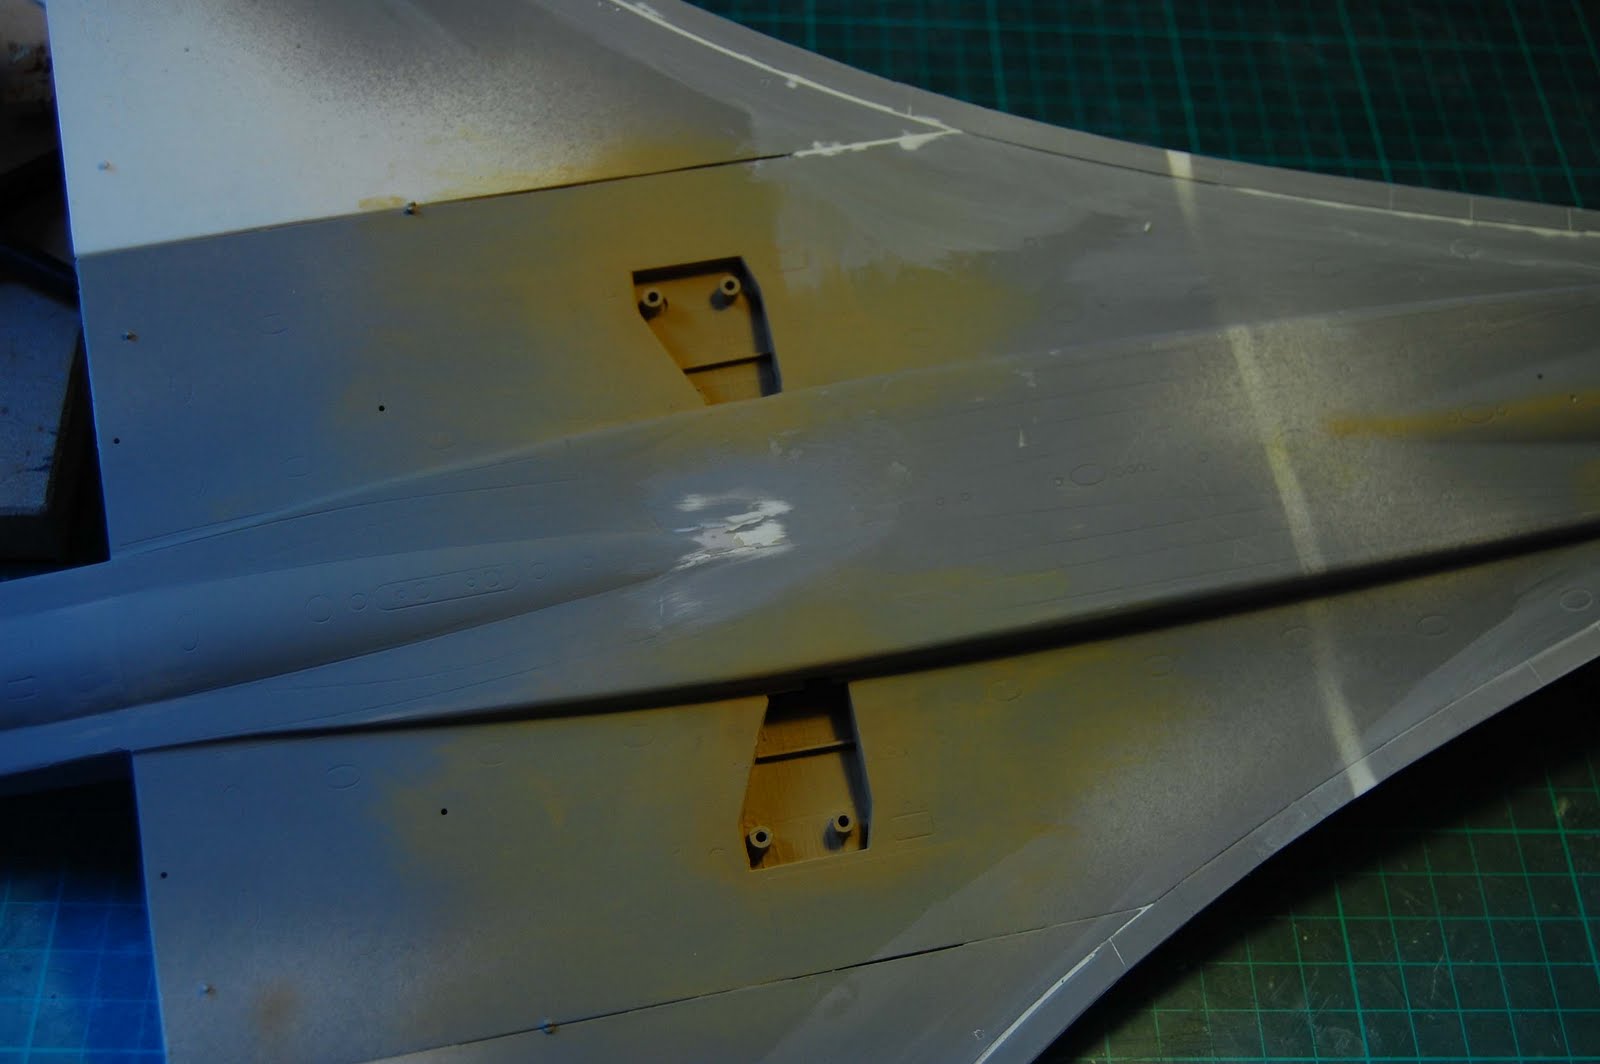
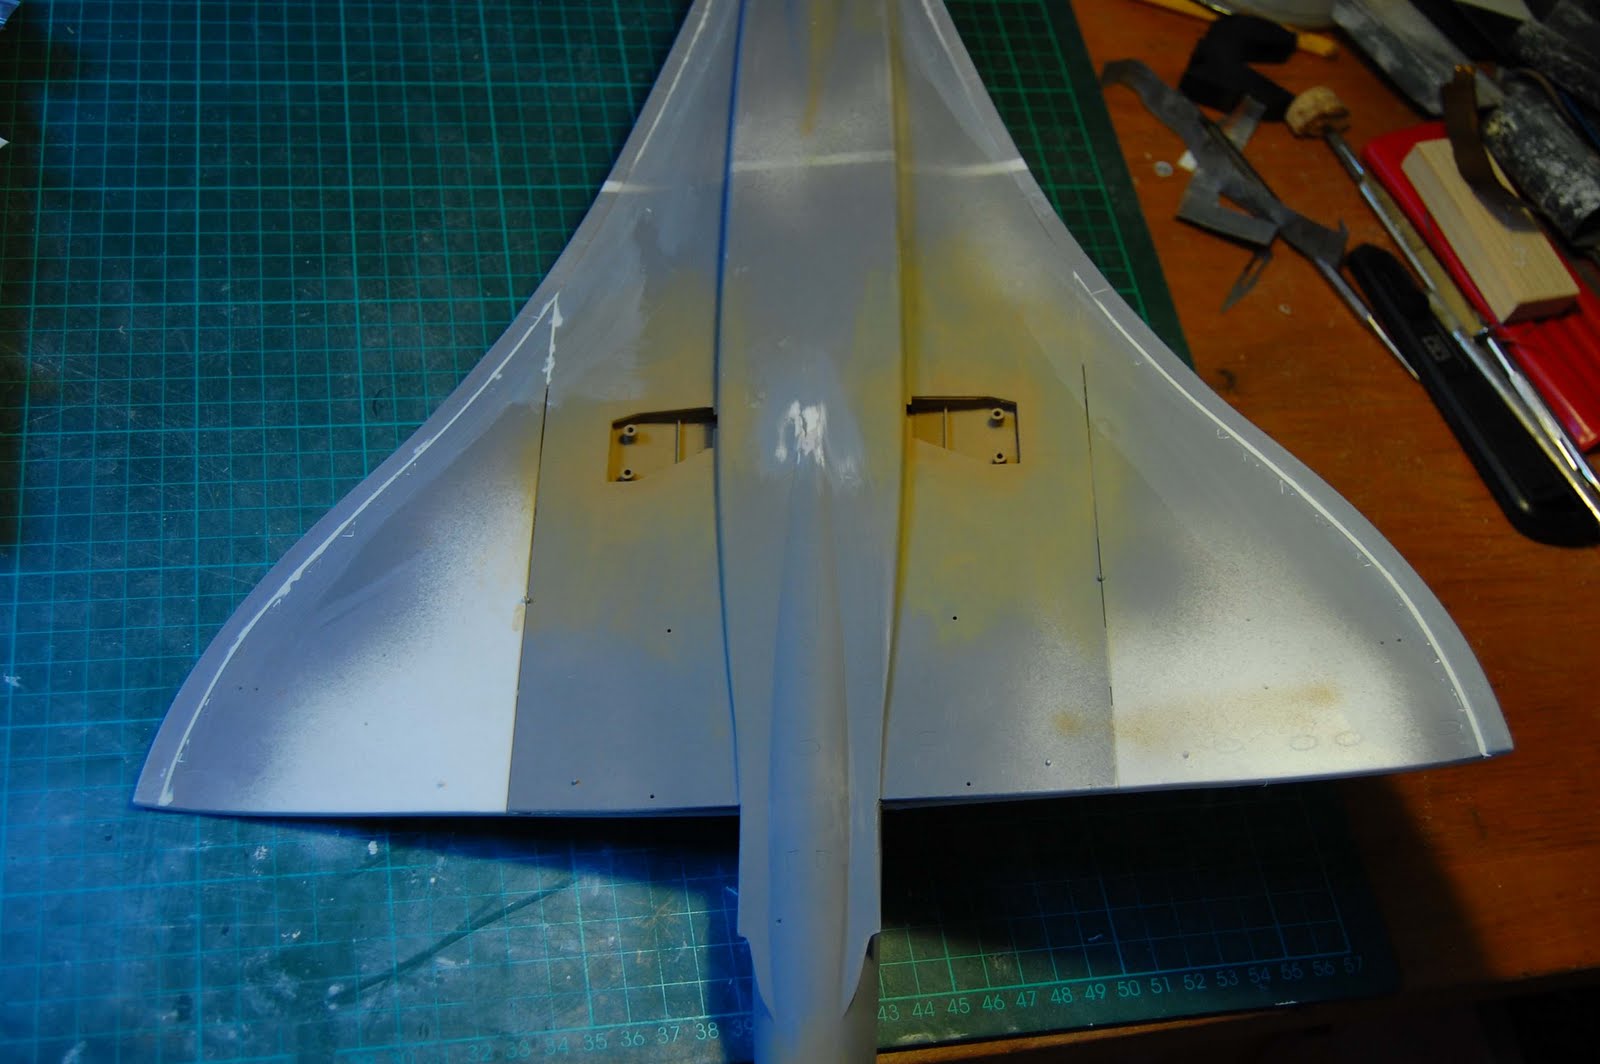
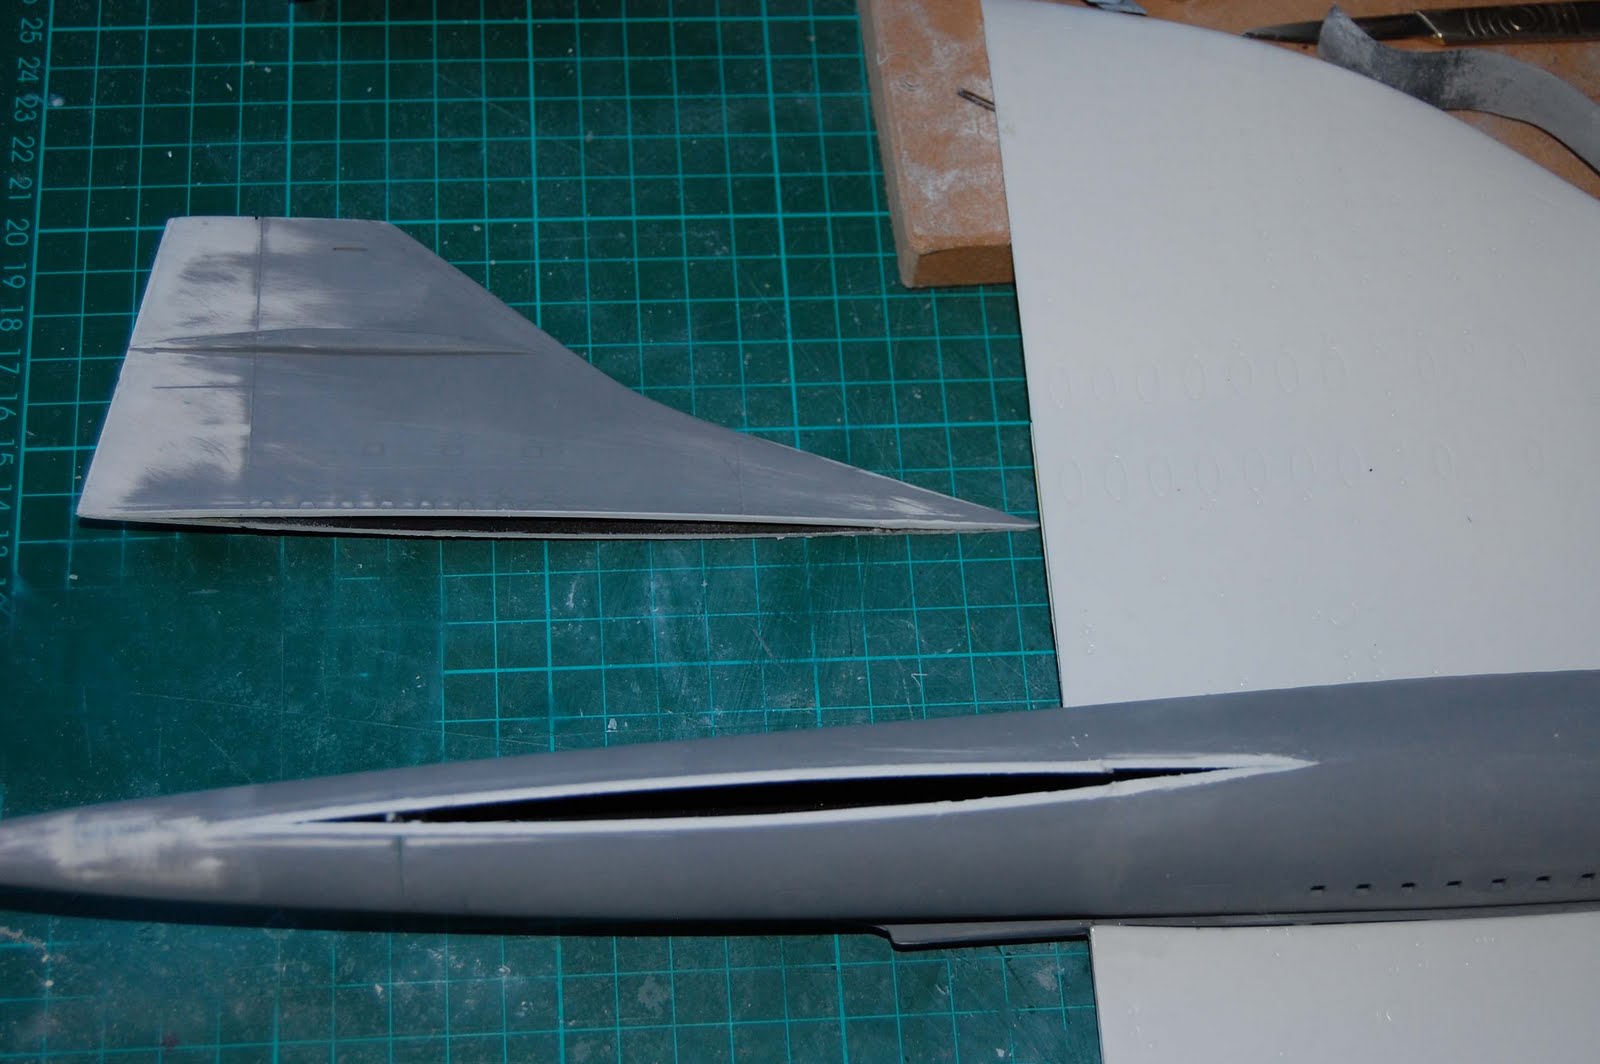
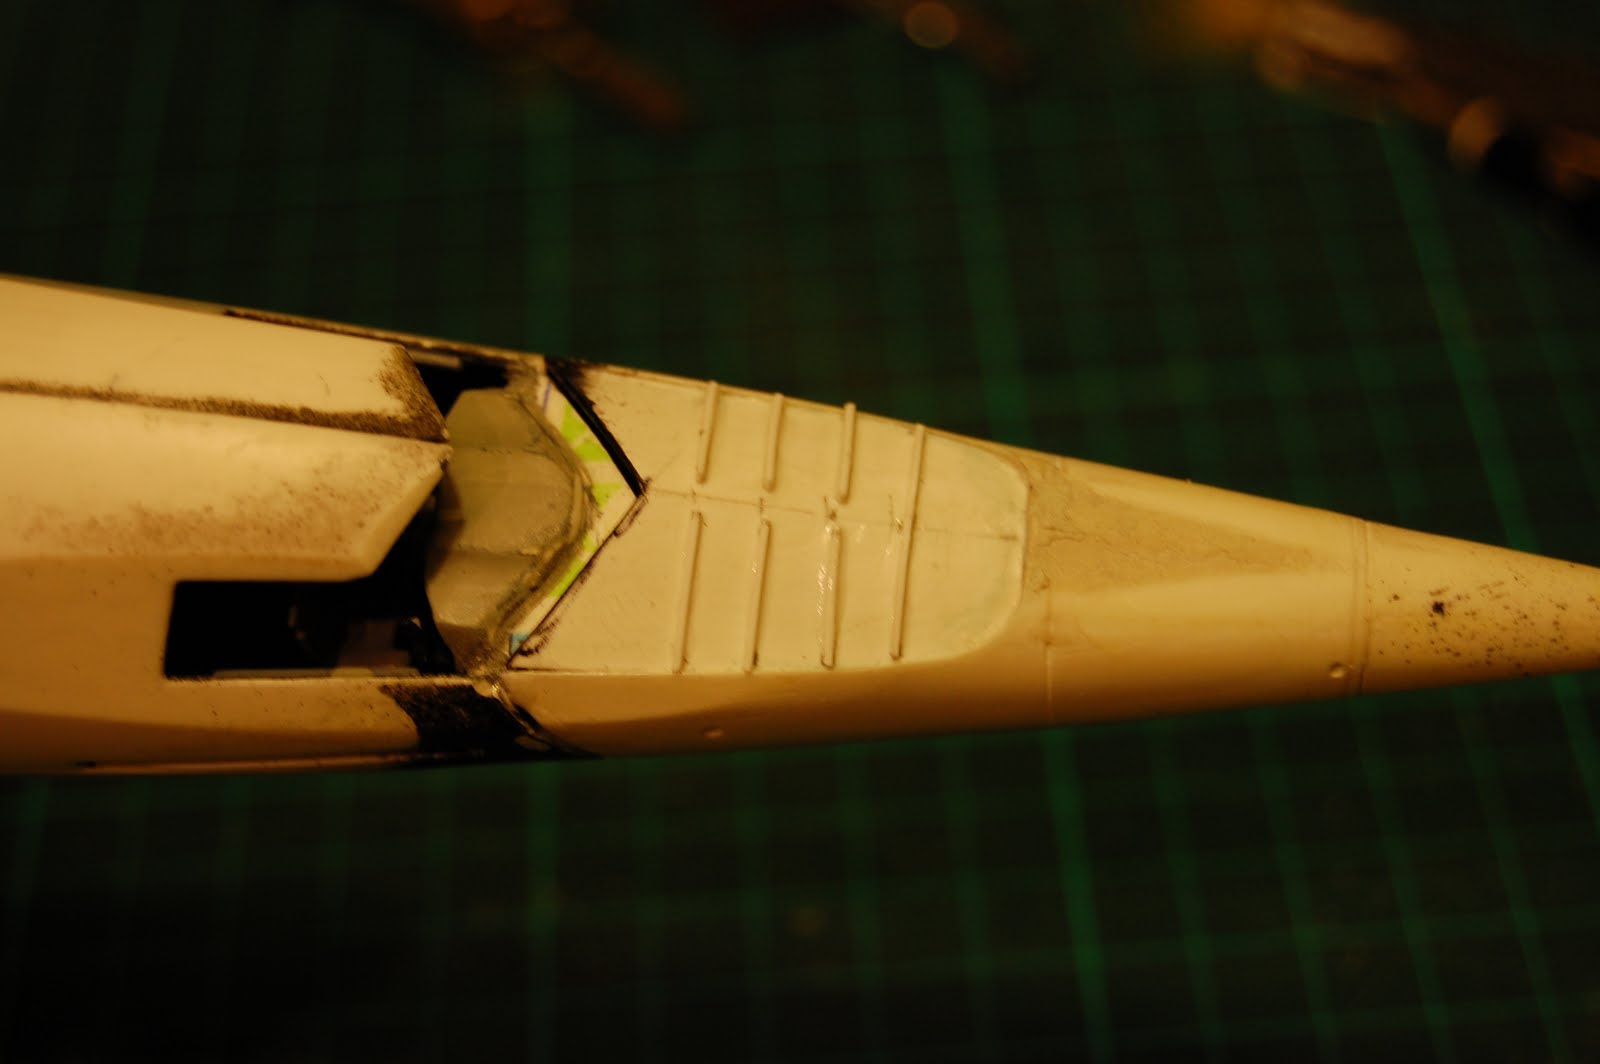
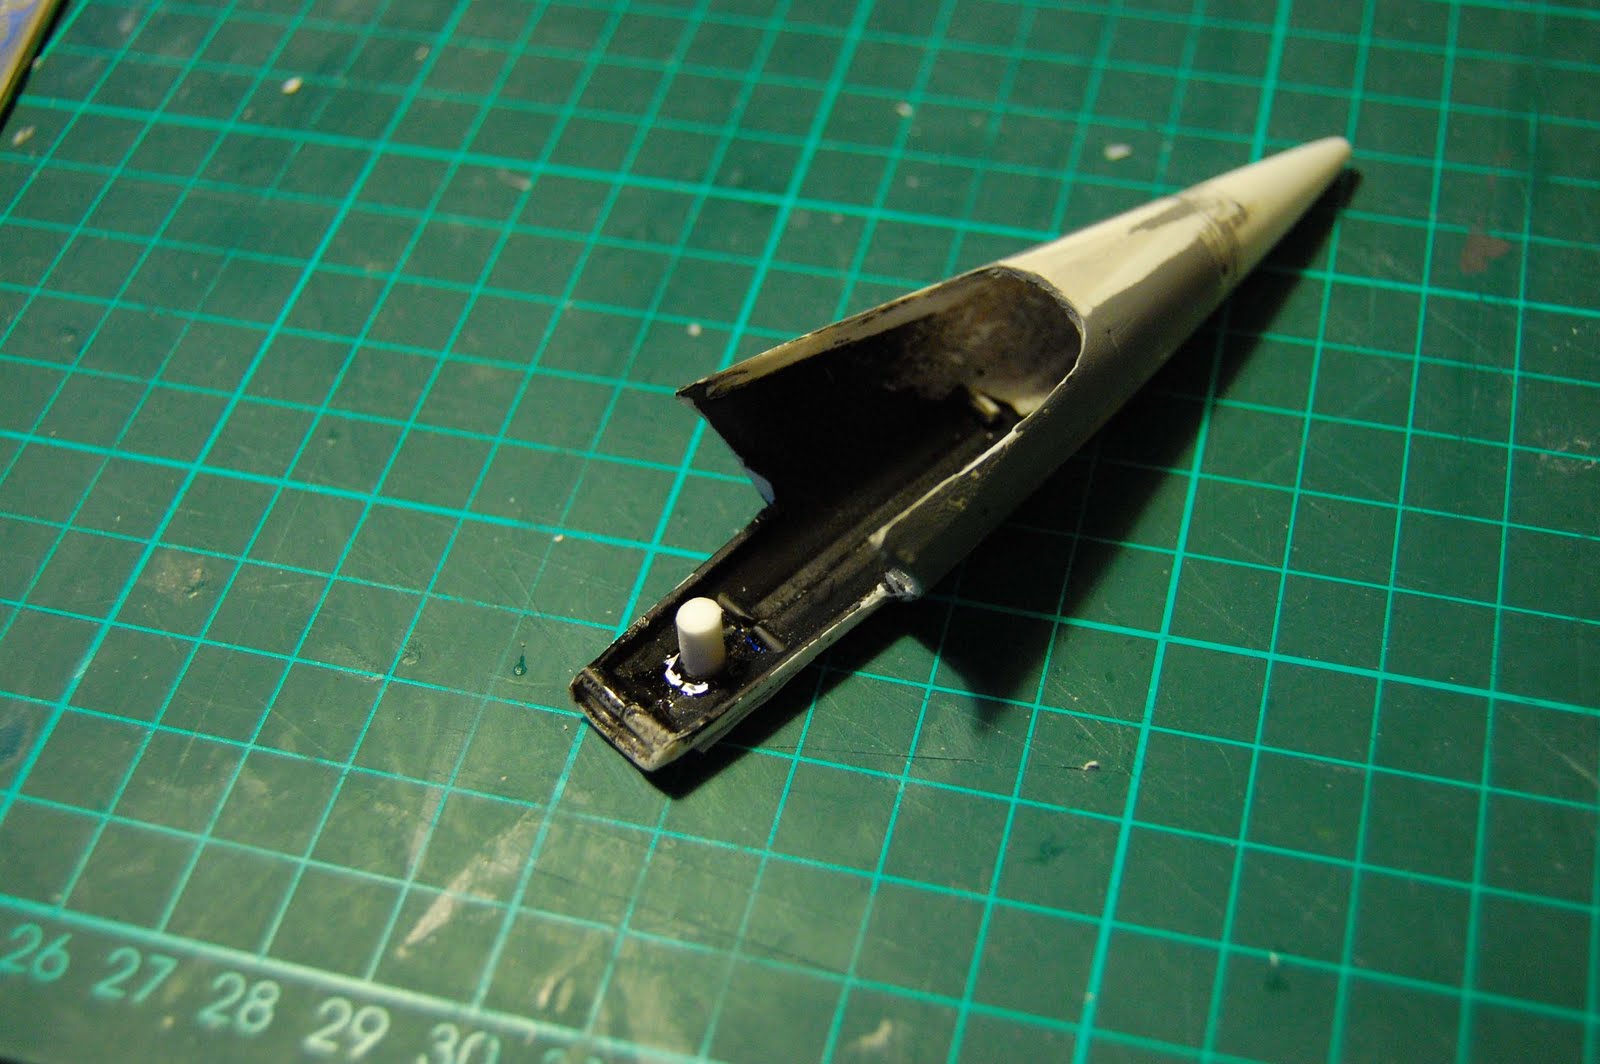
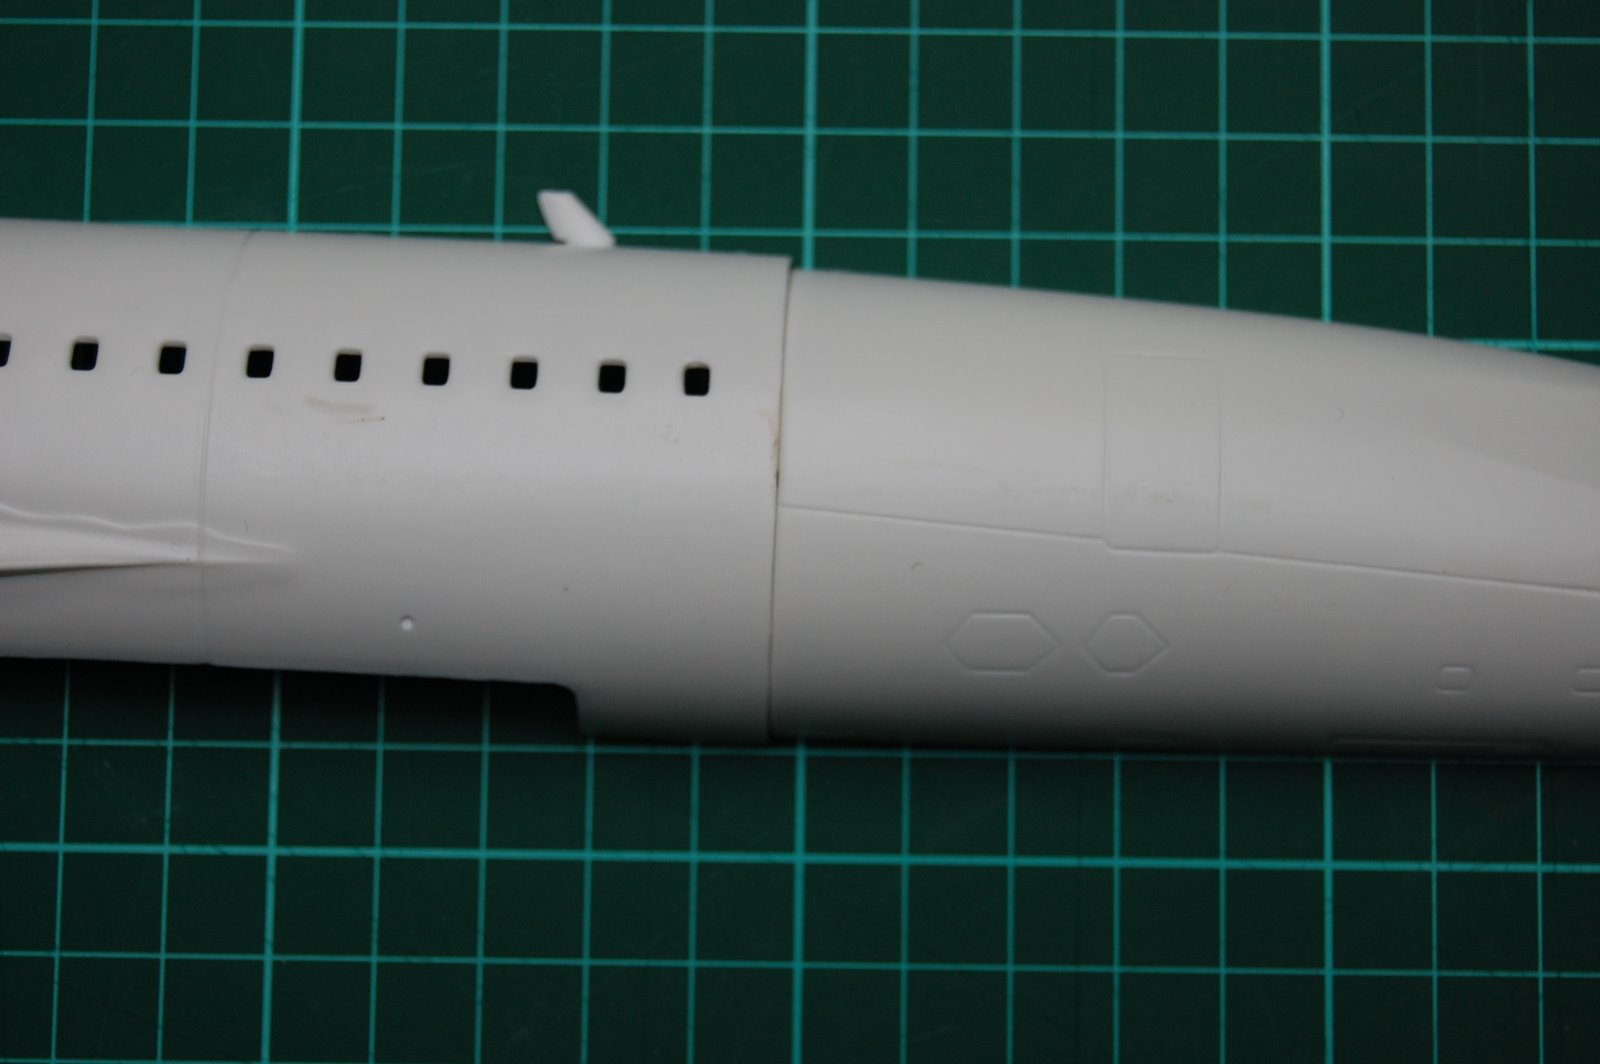
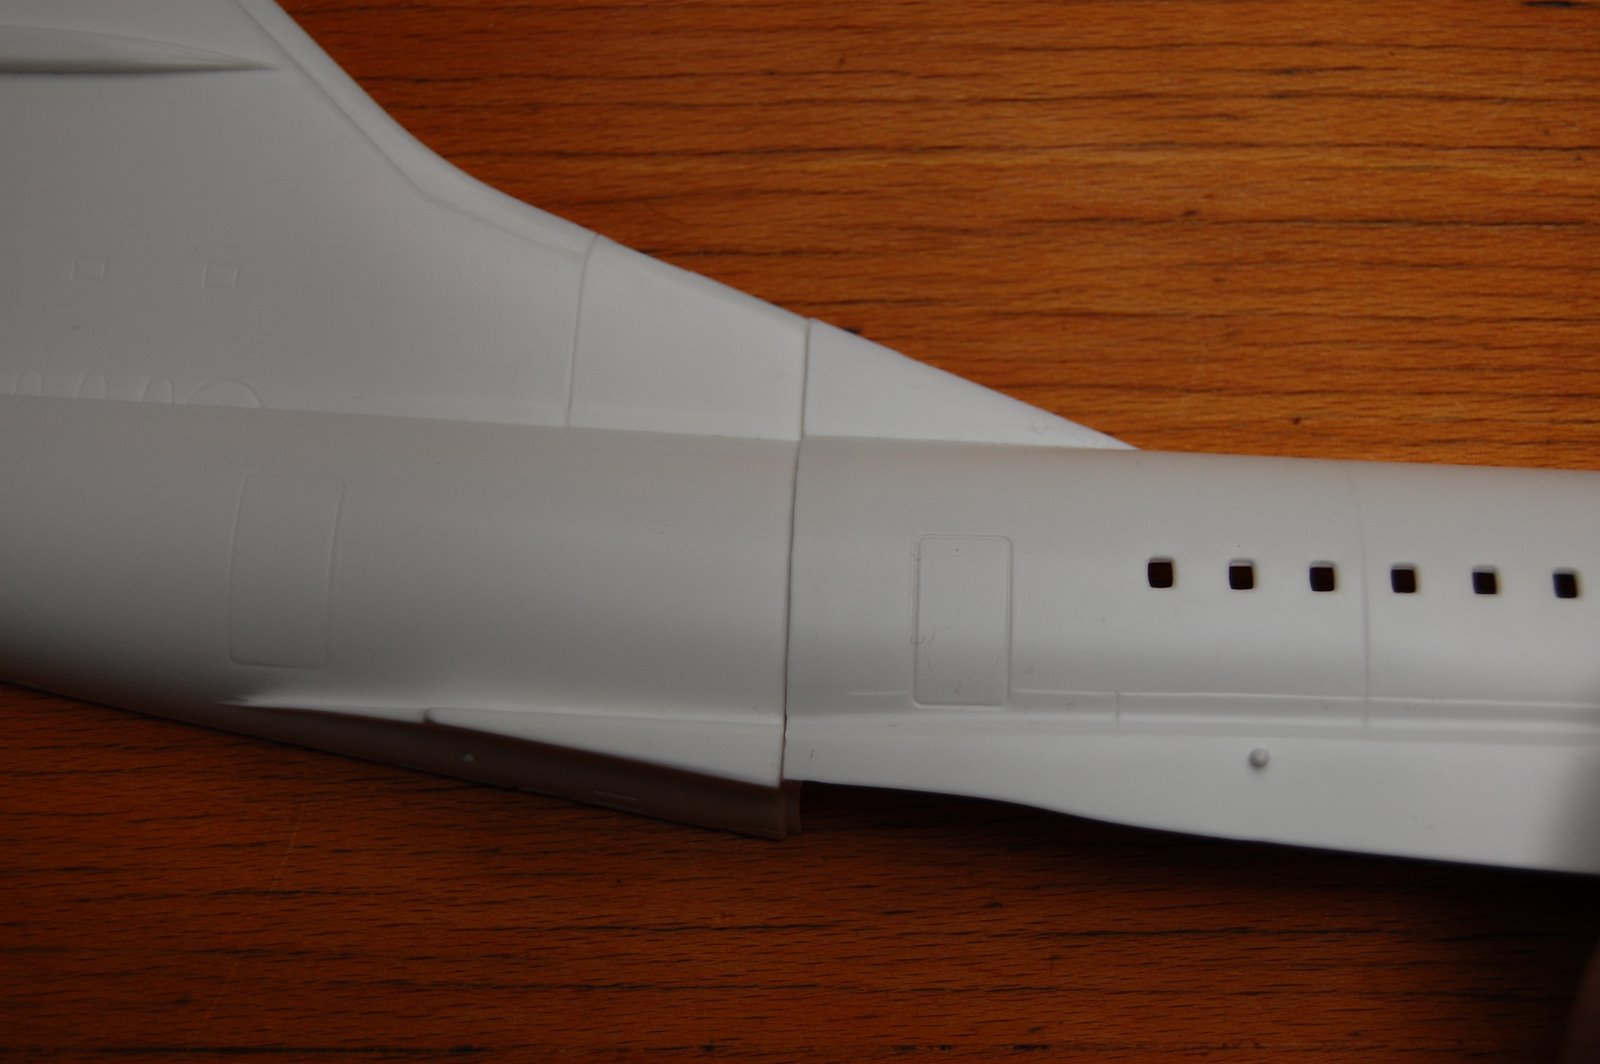
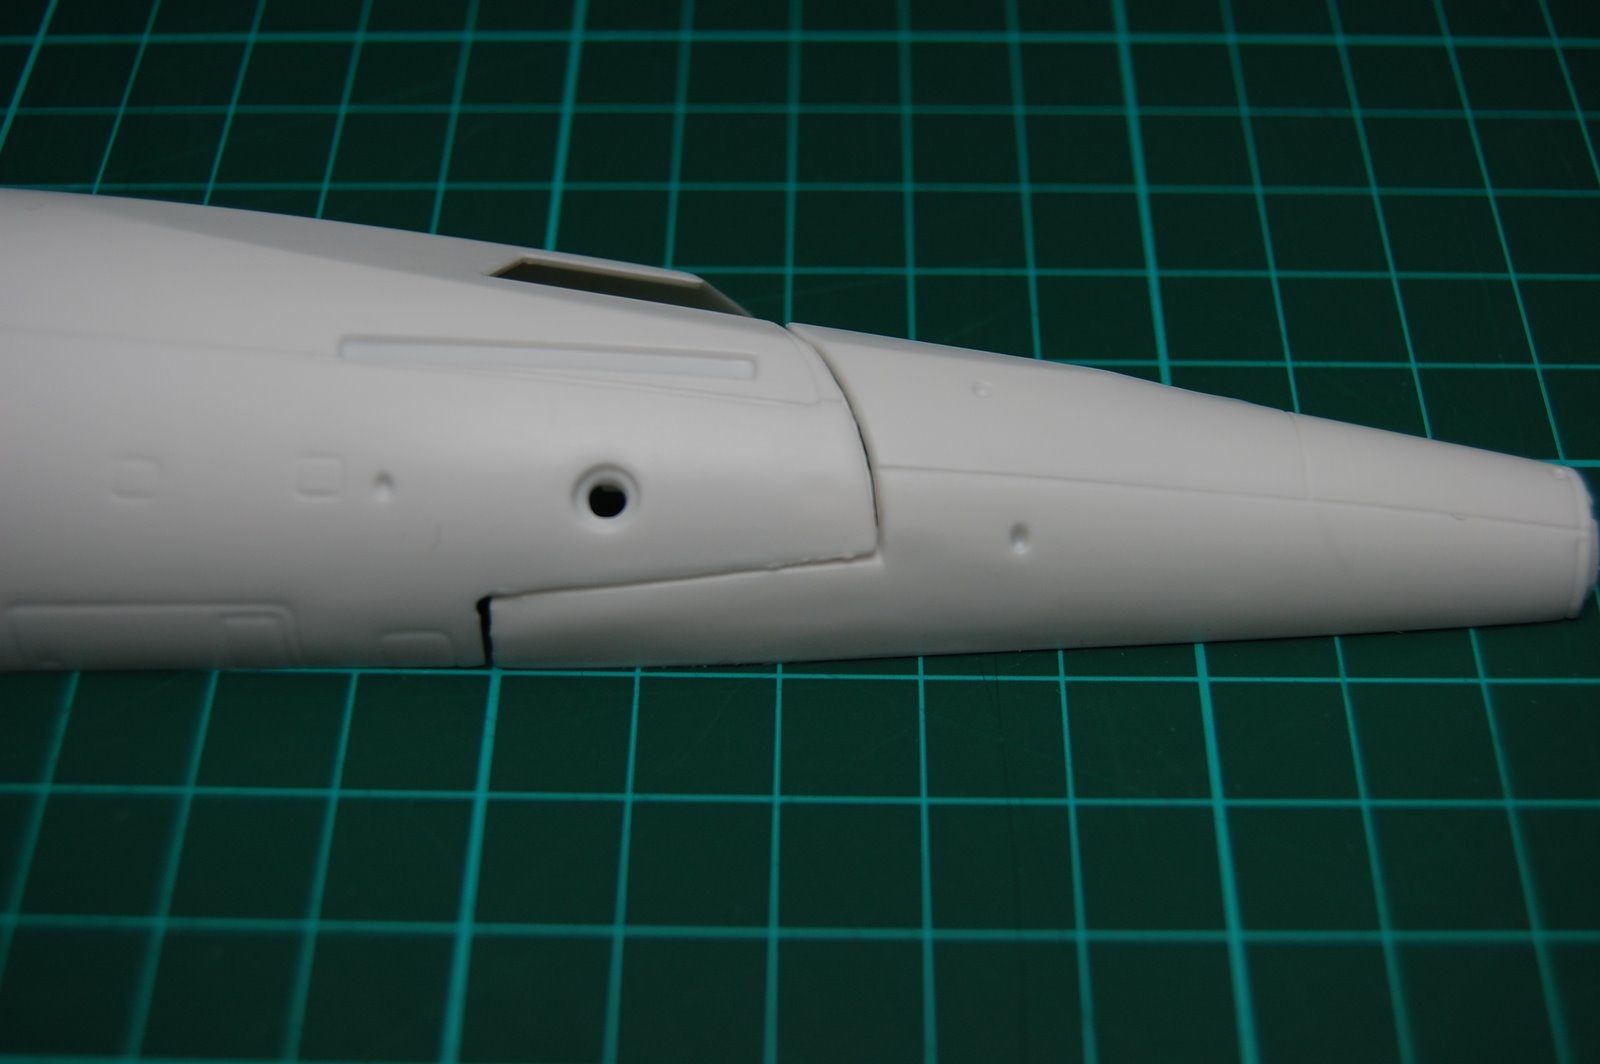
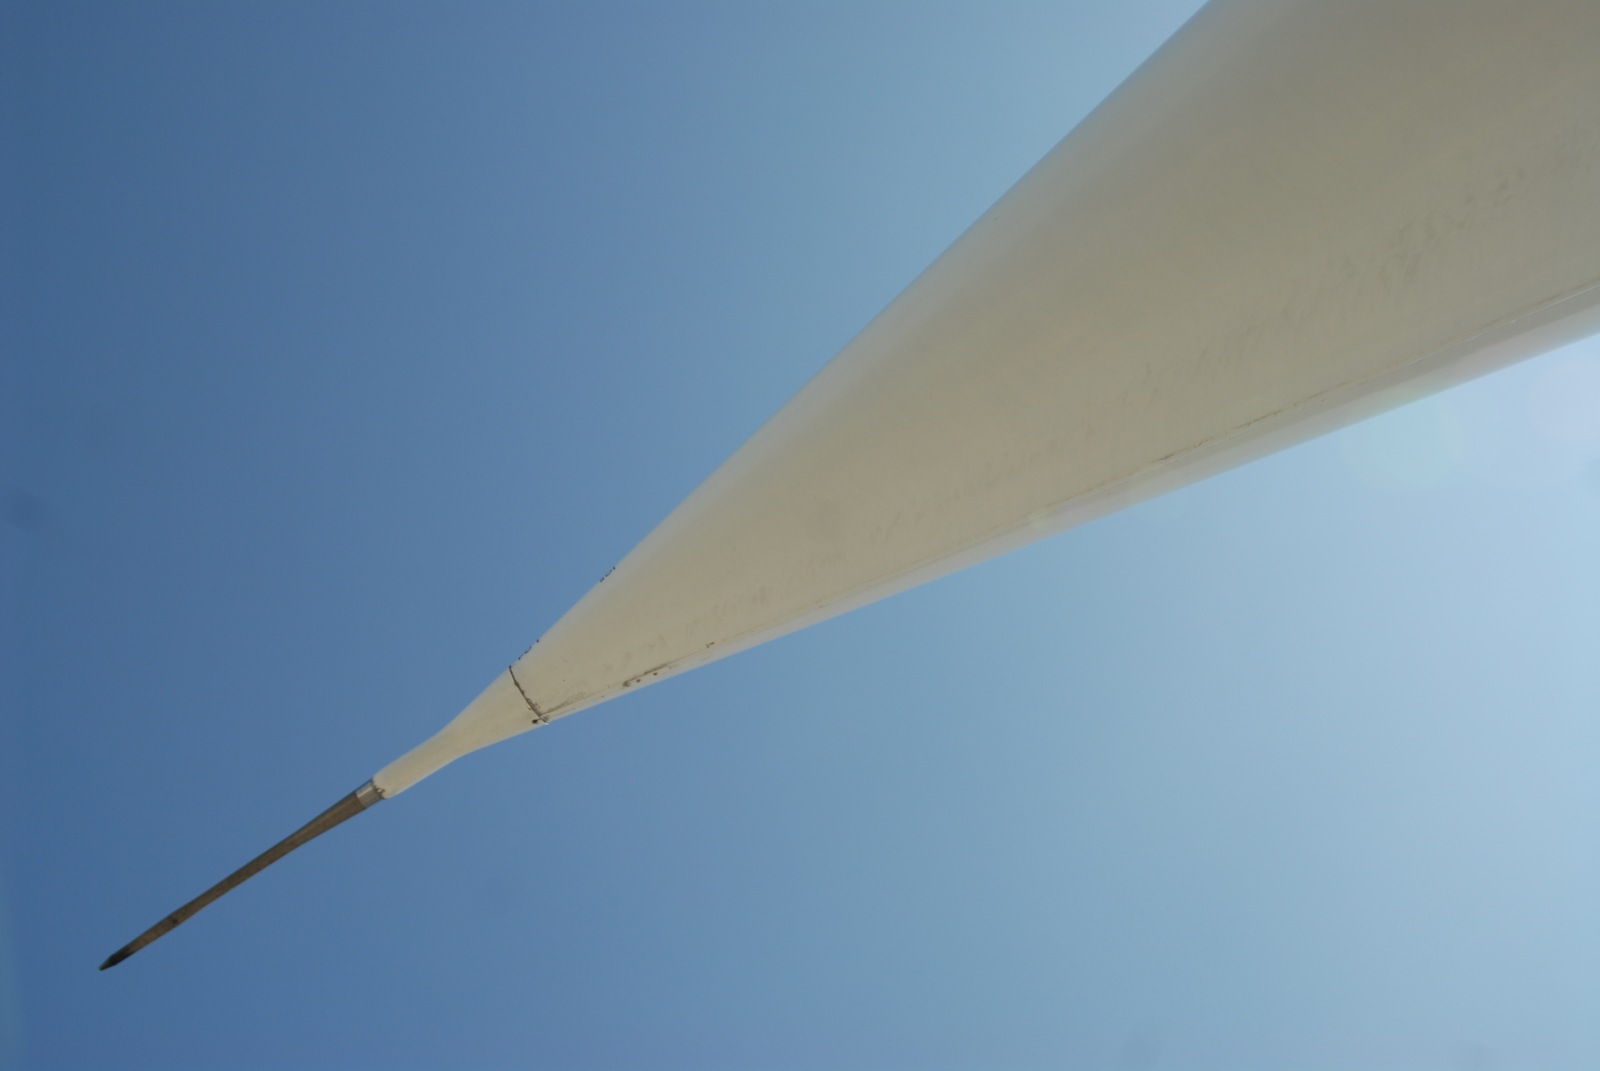
The tailfin is back on and now at 90˚ to the wings (and in line along the fuselage!). I’ve used polyweld type liquid glue and filled the gap with stretched sprue. You may notice that I’ve rescribed the panel lines on the fin so that they line up on both sides.
As a side note, I use a fine scribing nib (I think it’s a mapping nib) and holder to apply the liquid. I had a few kicking about from my art school days, but only plastic ones, so this one’s starting to fit the neck of the bottle really well… I’ve found it holds enough glue and is accurate to put it where you need it. You need to dip regularly, but I’ve never had too much running all over the work.
I’ve seen some nice wooden ones on the net, which may replace this one somewhere down the line.


I’d already made up the tail light from a piece of clear sprue, drilled a small hole and popped some red paint in there. Then filed, sanded and micromeshed to this: Other jobs done were:
Filled the fuselage seams.
A bit of foil detail to the main gear well
.
Fitted the main gear doors adding some plastic tabs for support then filling, sanding etc.

Also fitted the wings without much fuss – quite a good fit actually. A good join to the gear well walls.
Miliput was needed to fill the gap on the underside along the curved outer edge and the outer wing pieces (#22).
The underside, right at the front of the wing root, around the landing lights, was pretty poor, with no attempt for the wings to fill the gap. Another one on the list for filling, along with some minor filling along the top wing root.At the back, I’ve discarded the bump-wheel well and scratched a bulkhead along these lines:
to which I’ll add a scratch built bumper wheel.
As you can see I’ve also re-sprayed the gear wells in Humbrol 93 (desert yellow).

Admittedly, I’d had a glass of wine, but the other night I was looking at the plane and the tailplane just looked ‘off’. I looked down the length from nose-to-tail, tail-to-nose and it just wasn’t at 90˚ to the wings. I slept on it and checked again in the morning. Yep, definitely wrong. So, I sliced it off, which was fairly easy, filled the gap above the bump wheel well and set about some other jobs.

Apparently the forward gear bay needs to move 12/13mm forward to bring it closer in scale.
I know I said I wouldn’t be rivet counting, but that’s quite an error and I felt it justified the small(ish) effort to fix. The work is pretty straight forward, with the cutting of the bulkhead being the trickiest part for me.

I added some flattened sprue to reinforce the wheel bay attachment to the fuselage and also at the bulkhead (mainly because of the gap left after the over-enthusiastic use of the file.)
I couldn’t put it off any longer. I had to build the huge fuselage sections.
I opted to build in two halves, not on tubular sections as in the instructions. With a bit of coaxing the sides went together without much work. I had a couple of days away that provided plenty of time for them to set. Joining the halves together was tricky, due to the size of the thing. I shimmed out the joint between the front section and main fuselage on the L/H side as the diameters were different. Still needed lots of filler…
Then, when closing up the fuselage, there seemed to be a slight bend along its length so that the trailing edge of the fin was just over 1mm out of alignment. Not ideal, but nothing Miliput couldn’t solve. The panel lines around the fuselage were thus out of alignment, but, as I was going to rescribe the soft lines, that wasn’t a worry. Sighting from back to front and vice versa I couldn’t see a noticeable bend or twist, so that was OK. I don’t know what I would have done if it was noticeable anyway!
The centre join was reinforced with styrene strips and putty.
I filled in the gaps around the front wheel well with styrene and Miliput and sprayed a primer coat of the recommended paint, Humbrol 81, Pale Yellow. I think I’ll put a final coat of 93, Desert Yellow, as that seems to tie in with my reference photos.As the long bay doors are closed I wanted to fit them now and sand flush to the same profile as the fuselage. I added a strut of sprue to provide support to the doors (moulded in one piece) to withstand the forthcoming work.

I made sure that the angle of the visor and the nose were aligned and tacked it into place. Once set, I liberally applied some thick glue and left over night. Next day, I filled in the gaps and the area where the visor and nose join with Miliput.
Even though I was careful to seal up any holes I couldn’t prevent the fine dust getting under the visor whilst sanding to shape. I gave the front end a good rinse under the tap and dried over a radiator. Not perfect, but certainly an improvement.
First I roughly shaped with a file and then worked through wet & dry and finally onto the micromesh.
Then came the masking.
Using plenty of photo references I got as close as I could with masking out the windows and visor. A couple of coats of primer and time to move on to the next bit.

It’s over a year since I updated this blog. There have been around 50 views, but no comments. Can’t blame them for that. So, what’s happened to that lovely lump of plastic?
I’ve found the enthusiasm to have a bash at Concorde again. Since the last post my modelling has not progressed. I haven’t been busy with other model projects, honing my skills etc. All my kits have been sitting in their boxes waiting for me to be bothered to take them up again. So, as I’m on my own for a little while here’s a new installment of the Airfix Concorde…
One day, long after I’d forgotten about it, a replacement clear sprue arrived from Airfix and I set about fitting it. I was faffing around with clear sheet to scratch build a new screen and visor, but the new, unbroken parts looked a lot less work and would be a better starting point. Over the last few nights I’ve basically taken apart the cockpit/nose section and started again as I’ve pieced together this tricky jigsaw.
This is where I picked up the project. I was trying to close the gaping hole under the canopy. In trying to get everything to fit I could see that the best way forward was to strip things back and start again.I removed the droop nose and split apart the front fuselage to access the side windows and also to add a little bit of detail to the cockpit, as it was visible from the outside. Not much, just some foil seat belts and the instrument panel decals.
The side windows do not have the correct profile or framing, so I wanted to blend the glass and the fuselage seamlessly in order to mask up and spray the correct profile later. I cut the side window/windscreen in half so the clear pieces would slightly protrude and used my wonderful micro-mesh sheets to flatten and re-polish.

I used a few tiny spots of cyano to fix the clear part and then used filler and Kristal Klear. The cyano didn’t fog at all.A coat of Future was applied inside and I set to work on the cockpit. The front console was too high and had to be removed, sanded and refitted. I inserted a styrene strip to fill the gap between the windscreen halves. Looking at reference photos of the cover that closes the gap under the visor, I added styrene to the windscreen. This would also provide a good, strong area to attach the cover.

I then made a new cover (using the first attempt as a guide) and attached it. I taped on the nose and offered up the clear visor. The fit was poor (of course), but with a bit of fettling I achieved a reasonable fit.
Before I could fix the visor I had to paint the windscreen and cover as they will be inaccessible with the visor fitted.
The nose could now be fitted. As the locating lugs had been filed off I added a section of sprue to support the back end of the nose and then blanked off the front of the cockpit with a piece of styrene. I did this to prevent dust from entering the cockpit, as there is a lot of sanding on the horizon…
The nose was glued on and the gaps filled with styrene strips.
I’ll leave that overnight to cure and then set about the visor.

Using reference photos I added wire and plastic card to the front undercarriage leg to suggest a bit more detail. Filling was necessary to blend some of the parts together and a light coat of white primer sprayed over. That’s as much detailing I’m going to do until I fit the wheels.

Most of my time has been spent on the windshield and visor. The visor was broken when the kit arrived but the fit was really poor anyway. The windshield isn’t very accurate and is far too raked. I’ve been experimenting with scratch building new clear parts. The results look promising, but there’s an awful lot of fiddling and fettling to do. I had a job to find any reference photos for the ‘cover’ under the visor. There’s nothing in the kit so there’s just a void into the nose. I eventually found some at the excellent Concorde-Photos site. Took some searching but found enough to give me some idea of how it should look. That’s what I’m doing now, trying to fit some plastic card into the nose to seal off that void. As I’m using thin clear plastic that area will be quite visible, so it will be worth the effort.


This is the plastic card cover I’ve fashioned and a clear plastic screen:

I’ve tacked the fuselage halves together at the front and fixed the cockpit in place. I didn’t do much to the cockpit as it’s so dark in there that any detail will be hard to see. The black overspray is from inside the nose. My plan is (once the cover has been painted), to fix the windshield at the top and wherever else it makes contact with cyano and then to trim, fill and sand the top to blend in with the fuselage. Any clouding caused should (I hope) be covered when I mask up the frame.
I’ve assembled some of the engine too:


I used poly-weld as there were a few gaps, but not too bad compared to the rest. I haven’t fixed the end pieces yet.

For £24.44 ModelActive provided me with the 1:72 Airfix Concorde kit. Easy isn’t it. Inspecting the contents I found the clear visor rattling around the bag in two pieces. I’ve requested a replacement, but could mend it. On the other hand I might contemplate scratch-building a visor as the original part is thick and really un-defined. Scale canopies and glass are difficult to achieve but at least this subject is fairly simple.
The rest of the kit looks fairly straight forward and the size is really impressive. It certainly inspires me to put the effort in as, once built, this would look great on display.

Most issues I’ve read about have been to do with the fit between fuselage sections. The instructions suggest that the sections are constructed then these ‘tubes’ fitted together. Doing a dry run of the sections really shows the differences in the diameters along the fuselage.
I think I’ll join the sections for each side together first and then join the two halves together as I think the centre seam will be easier to deal with rather than 3 main sections of different diameters. With a little pressure the fit isn’t too bad (I’m not saying it’s great though).
There was no question that I wanted this model displayed gear down and nose up, so I’m not interested in the ‘gimmick’ of a moving nose. None of that around here, thank you very much. Besides the brittle clear plastic the mechanism’s moulded from (“Look, you can move it up, down *SNAP* oh, and off…”) the fit of the panels is pretty poor and will look sharper filled and re-scribed.
So, this will have to come off.Anyway, Step 1 : Starboard Engine and Intakes.
The moulding is very thin and the bottom leading edge of the intake is warped.
Hopefully I can sort this out when the dividing panel is fitted.

The engine panels have moulded vents on the underside, which I think are meant to be ‘spill doors’. Looking at the reference images these are incorrect.

The moulded flaps would lift into the air-intake whereas the section hi-lighted in blue is a large spill door and can be lowered. I’m not going to lower/lift anything here and I’ve sanded down the lumps and will fill and re-scribe. I’ve continued the panel lines up the side of the moulding as they were non existent. Also here are a couple of prominent panels and a few vents that I’ll try and detail.
To end my first session I tried to do something with the ‘back-end’ of the engine. The fans at the front are quite well hidden so a bit of dry-brushing will be enough there. At the hot end though some detail will be seen and something needs to be done to add some interest. The moulding is very basic so I’d like to at least add the after-burner rings. I sanded down the part using wet-and-dry on a sheet of glass to keep it flat. It didn’t take long to get through to the spokes and I was able to pop out the thin triangles and clean up the edges with a scalpel.

Looks better already.


Concorde has always held a special fascination for me. I remember the regular sonic booms as it flew over south Wales when I was a young boy and squinting to try and catch a glimpse. Visits to my grandfather in London were particularly exciting as I watched its approach into Heathrow. On the rare occasions that we went to the airport itself I would watch in awe as one took off and then scout around the terminal buildings to find one or two lurking behind.
In 1979 I can vividly remember a hot summer’s day out at Rhoose airport to watch an Air France Concorde fly-by and land. The airport was packed. I bought an Airfix kit and couldn’t wait to build it. It didn’t have any decals, but a letter to Airfix soon fixed that. It’s likely that it met it’s end a few years later at the bottom of the garden in some epic mixed-scale disaster scenario, involving a few Matchbox cars and matches.
The best encounter was during a trip to the Fire Department at Heathrow and a tour around the maintenance hangars. A Concorde, fresh from New York, had just come in and our small group were taken on-board. American newspapers lay on the seats and I remember how small it seemed inside. In the cockpit I was allowed to drop the nose and sit in the captain’s seat – what more could you want when you’re 13?
I bought a 1:144 Airfix kit from the airport gift shop and eagerly built it as soon as I could – may have even painted it – and it took pride of place hanging amongst my other plastic ‘masterpieces’ from the ceiling. It met a similar fate to it’s French predecessor.

So now, twenty five years later I am craving a styrene fix.
In the intervening years someone has conveniently invented the internet. Reference photos, tips & tricks from the pro’s, forums, and online shops around the world are available to all and has certainly fired-up a new-found interest in my old hobby. Perhaps it’s because my hands have grown, but those ‘massive’ Tornados and Phantoms in 1:72 scale seem so small now. Too tiny and fiddly for the level of detail I’d like to acheive now. Not that I’m a rivet counter – I just want it to be a pretty close approximation but not ‘toy-like’. My tastes and interests have changed and my enthusiasm ebbs and flows, usually based on nostalgia or a visit to a museum. So my stash includes a PBY-5 Catalina, MkIV Spitfire and EE Lightning F.6 all in 1:48 scale. A scattering of cheap 1:72 kits are for practice. I’m hoping to build-up my rusty skills and adopt new techniques on these sacrificial kits before applying them to the larger and more expensive stuff. One of the advantages of being a grown-up kid is being able to afford some of the kits that would have been out of range when you were younger.

Of course I had to include Concorde and the Airfix 1:72 (big and cheap) offering seemed an essential purchase.
Trawling the web for information I found a mixed bag of opinions from favourable to ‘run away very fast’. A couple of build reviews exist but not in as much detail as I would have liked, so I’m putting my two-penneth in and blogging my build of this kit.
The most useful reviews can be found here and here and do a much better job than I can of describing the kit.

There are a few things I’d like to acheive –
• a fairly accurate representation of the aircraft, without counting the rivets.
• as much detail as I can withstand.
• a straight fuselage, which could be a struggle from the information I’ve gleaned.

Here goes…